In this article you will learn how to edit the brand book in Imageshop so that it is tailored to the needs of your organization.
This article has three parts:
1. Introduction to editing mode
2. How to add or edit a new chapter
3. How to add a new toggle section
Introduction to editing mode
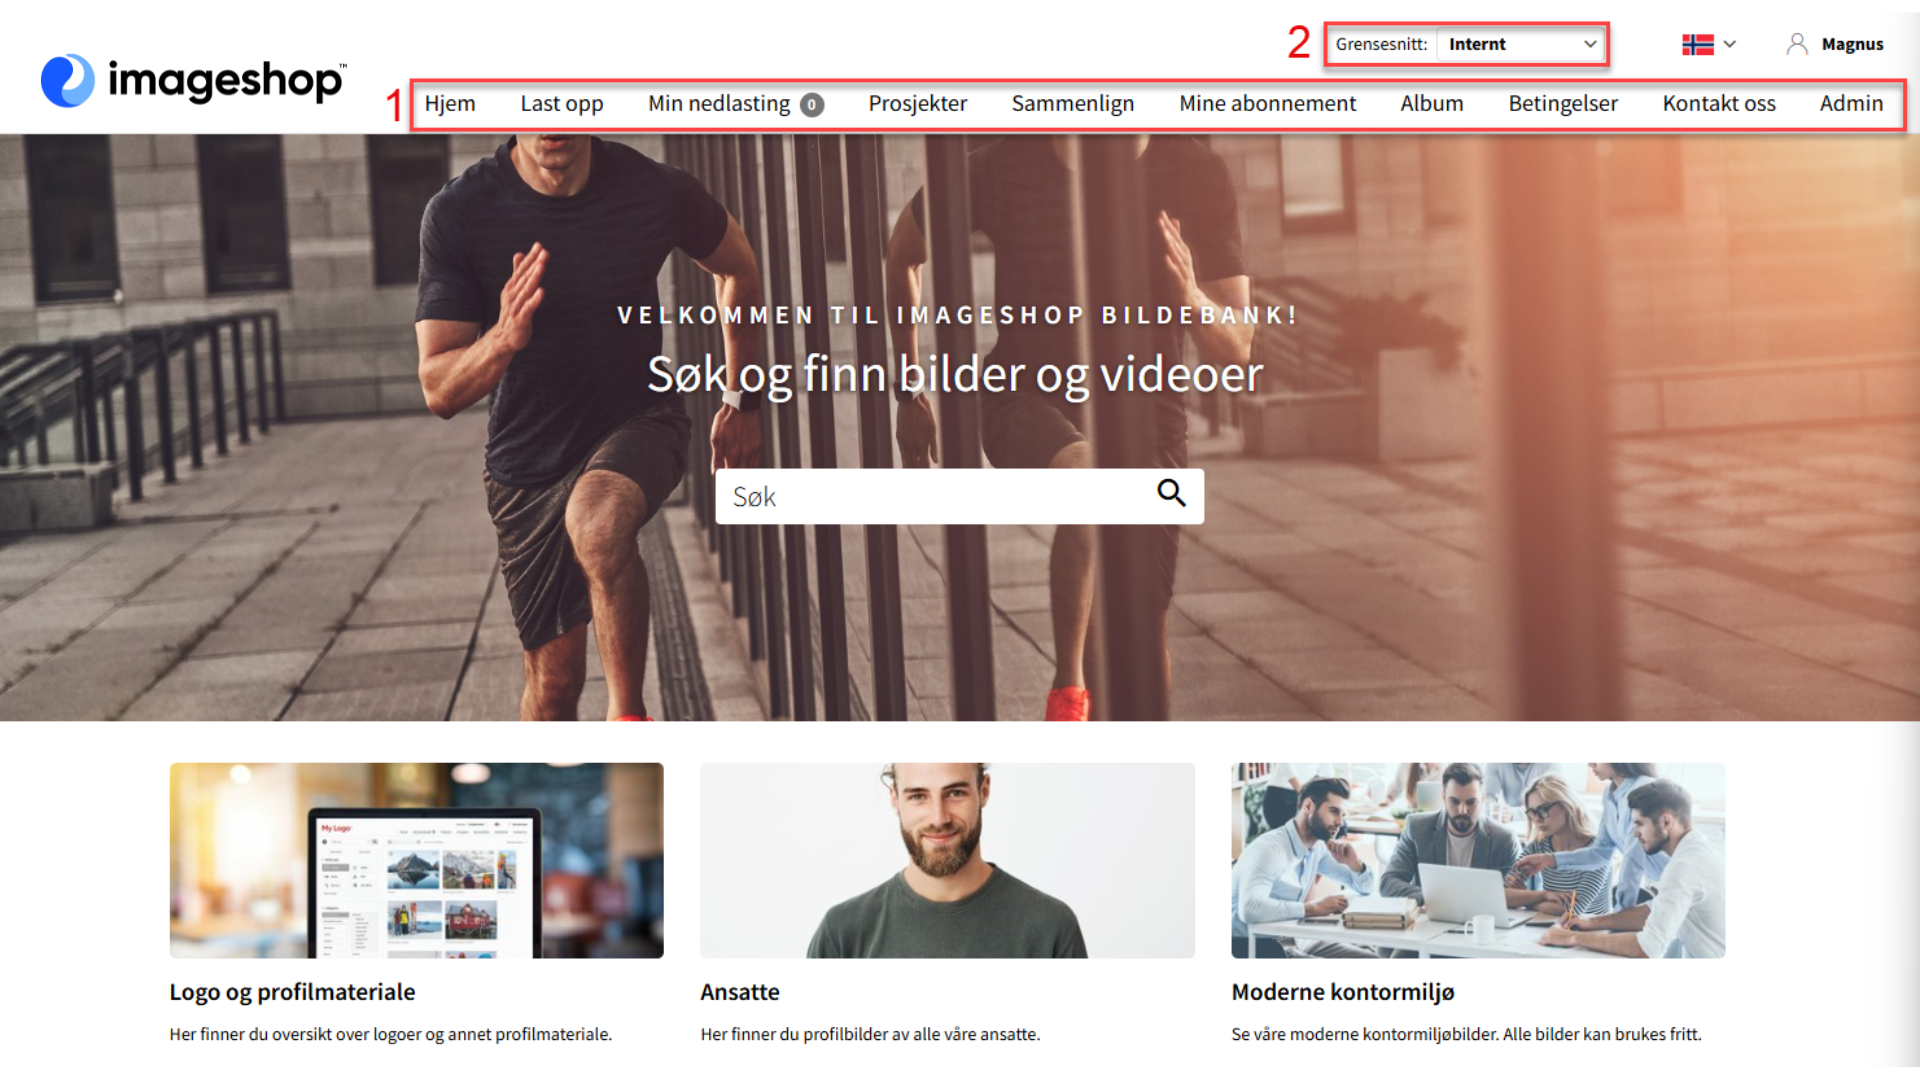
1. To get to the brand book, you must be in a user interface. You will find a link to the brand book in either the main menu (1) or the interfaces menu (2).
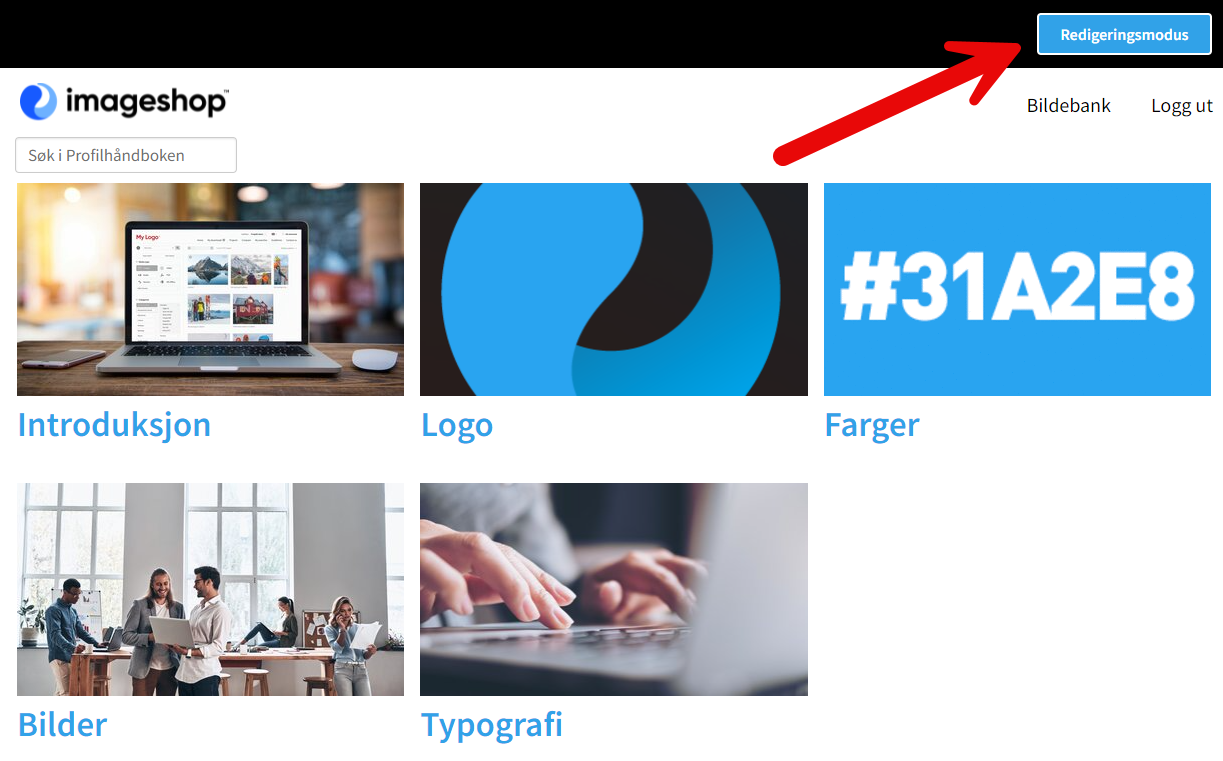
2. When you're logged in as an administrator, you can click "Editing mode" to edit the brand book.
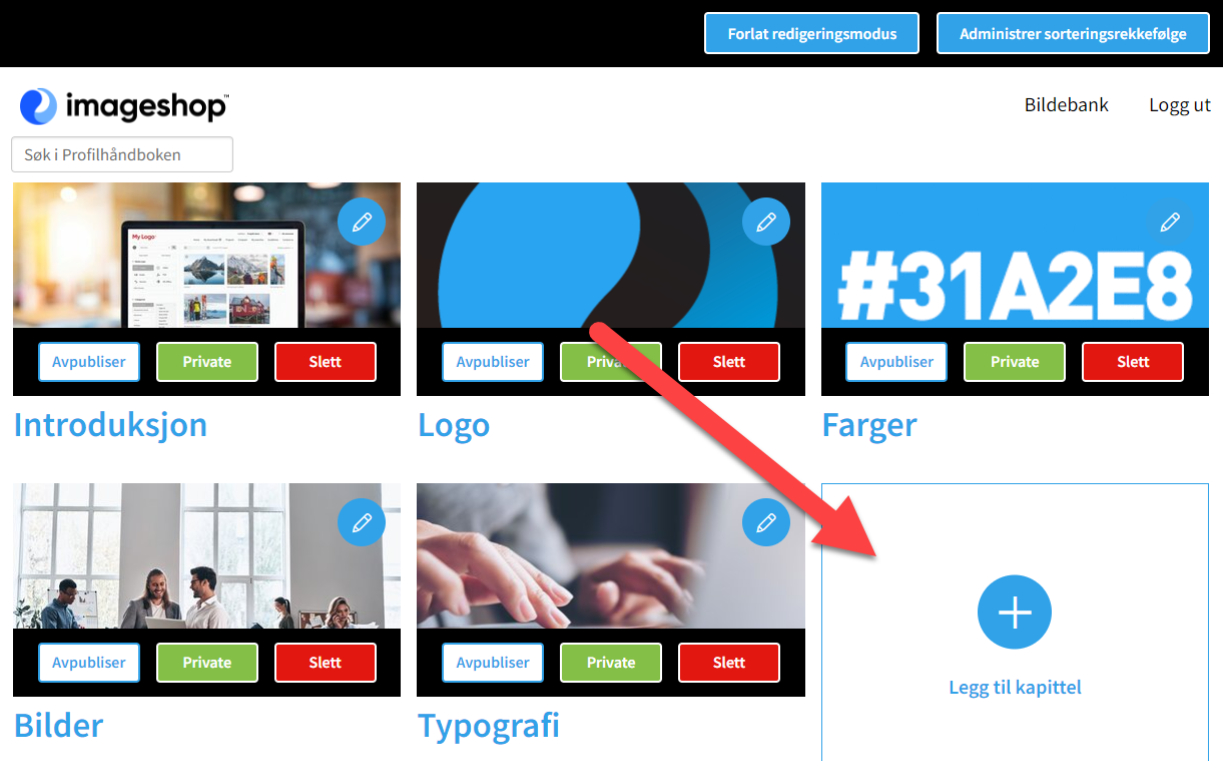
3. While in editing mode, you can make changes to existing chapters in the brand book (1) and add a new chapter (2). You can also change the order the chapters are sorted by (3). When you click this button, a new window appears where you can change the order of the chapters with drag-and-drop. When you're done editing you can leave editing mode by clicking the button to leave editing mode (4).
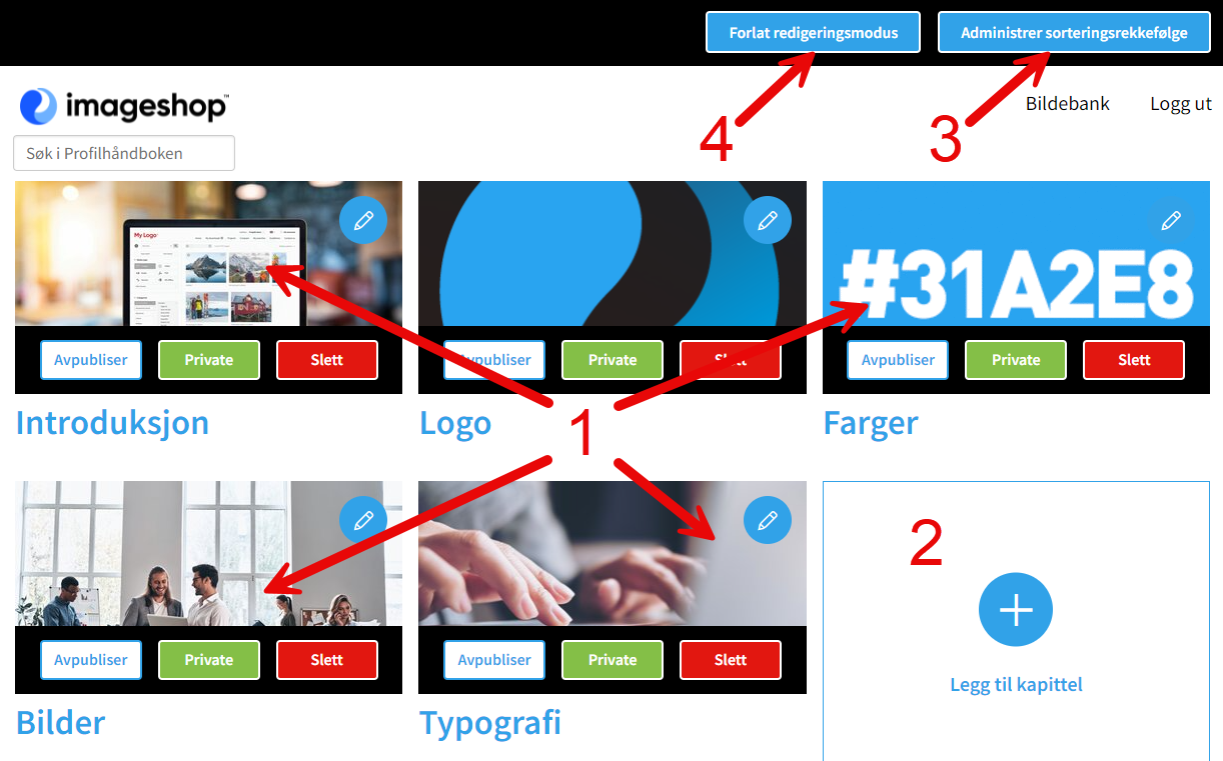
4. For every chapter you can do several things. You can publish and unpublish (1) the chapter, and you can decide if it should be public or private (2). Chapters that are public will be visible to all, which is useful if your organization wants a public brand book. Private chapter, on the other hand, will only be visible to logged in users. You can also delete chapters (3) and edit them (4).

How to add or edit a new chapter
If you add a new chapter or edit an existing chapter, the same window will be opened.
1. A. Adding a new chapter: Click on "Add a chapter" to add a new chapter.
1 B. Editing a chapter: Click on the editing symbol on an existing chapter.

2. In the window that opens you have to write a name for the chapter and add a cover photo. To change an existing cover photo, click the current photo and a new window will open where you can choose a photo from the image bank. When the name and image has been added or changed, click "Save".
If you want to make changes to the content of the chapter, click on "Go to chapter...". Note that you can also edit the content of a chapter by navigating to the chapter in the brand book while not being in editing mode, then clicking on the button "Editing mode", as shown at the start of this article. When clicking on editing mode you will always be able to edit the page you were on when clicking on the button.

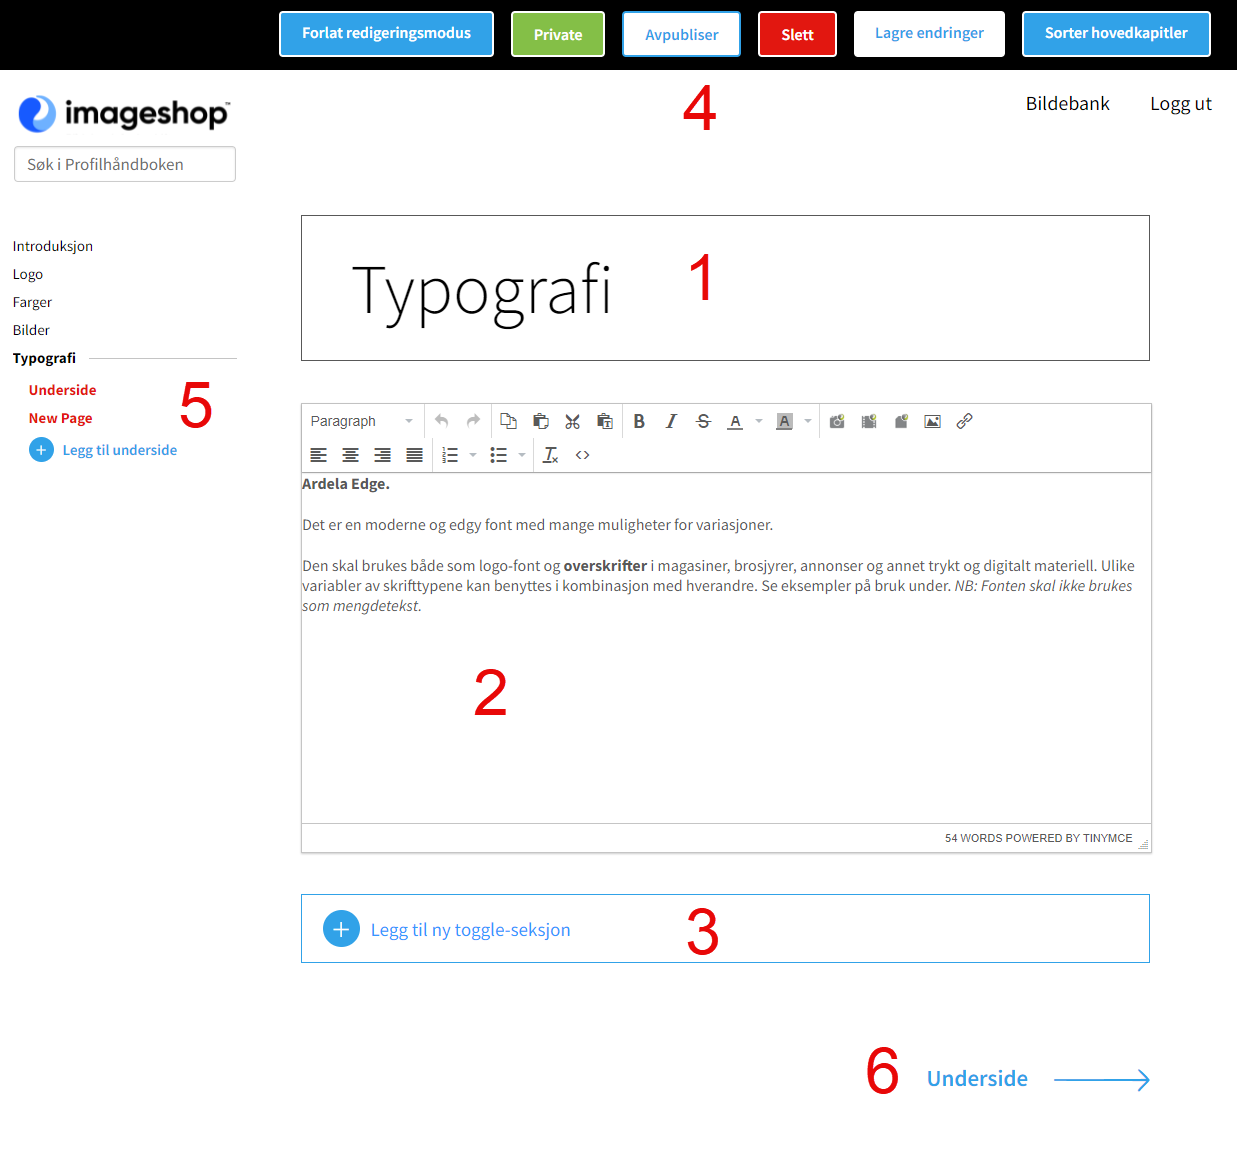
3. When you edit a chapter, you can edit the heading (1) and the content (2). When editing the content, you can also add images, videos and documents. Videos must be uploaded to Imageshop first.
You can also add a toggle section (3), which you can read more about below. When you're done editing, you can change the settings of the chapter at the top of the page (4). Here you can save the changes, delete the chapter, publish and unpublish it, and decide if the chapter should be private or public. In the column on the left side of the page you can navigate between chapters (5), and at the bottom of the page you can navigate to the next chapter (6).
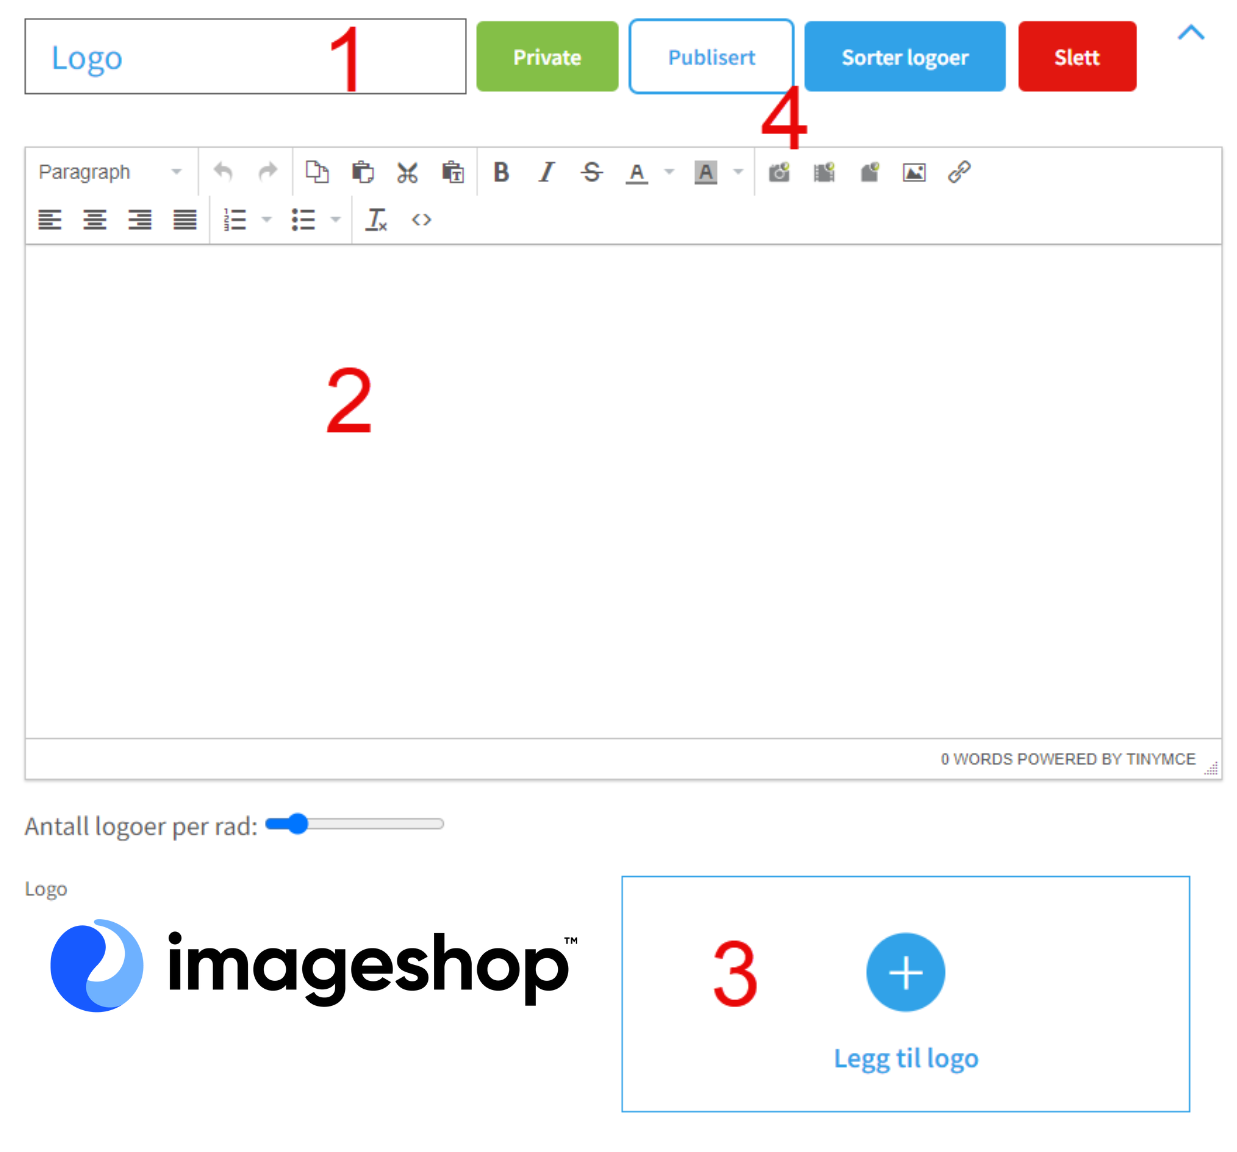
How to add a new toggle section
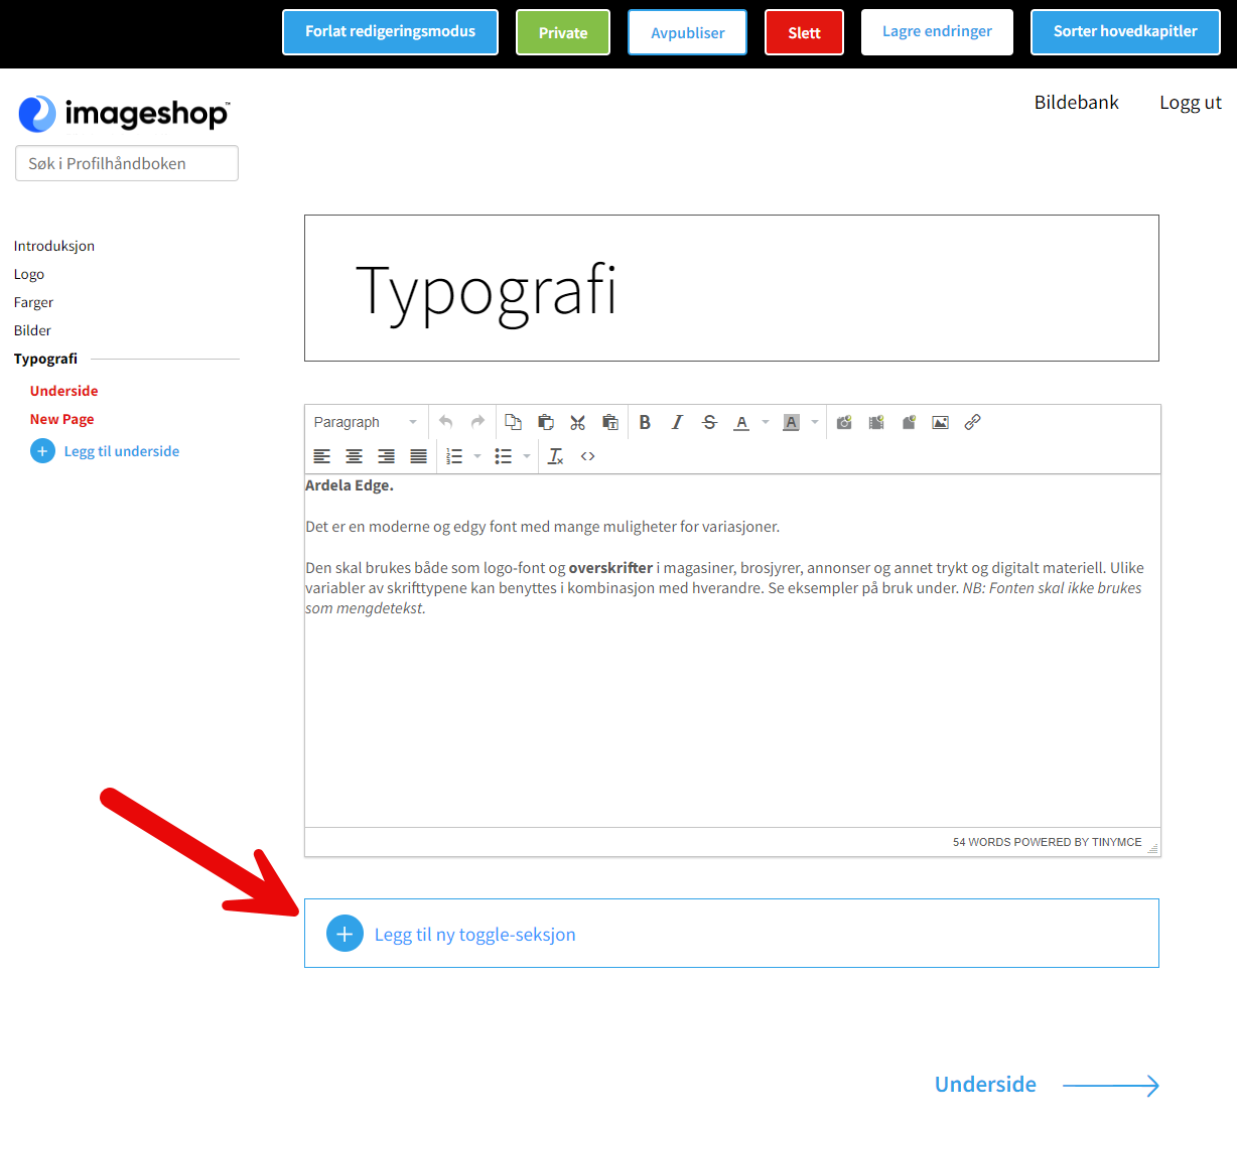
A toggle section is a block of text and images that can be opened and closed when you click on it.

1. When editing a chapter, click on "Add new toggle section"
2. When you're making a toggle section, you can edit the heading (1), the content (2), and add logos (3). When you've finished editing, you can decide if the toggle section should be private or public, publish it, and sort logos at the top (4). Here you can also delete the toggle section.