Search and find images you want to use in your presentation or document, and insert them directly into the document area – entirely without local intermediate storage. The integration with PowerPoint and Word is an additional module that can be purchased for your Imageshop solution.
Note: The Microsoft Office integration is an additional module and carries an extra cost. If you have any questions or wish to activate this functionality for your company, please contact us at support@imageshop.no.
How to add the Imageshop app to your Office program
The first time you use the Imageshop integration, you must add the add-in to your program. This installation only needs to be performed once per computer.
- Open any PowerPoint presentation or Word document.
- Go to the top menu, navigate to the add-ins section, and click on «Get Add-ins».

- In the search field in the top left corner of the window that opens, search for "Imageshop" and click «Add».
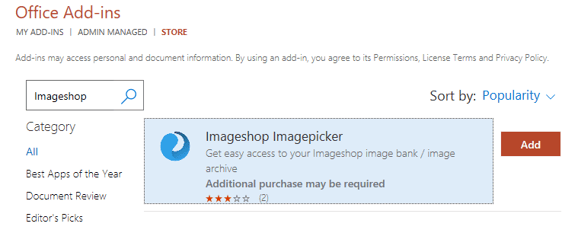
- The Imageshop add-in will now be installed. When you click on the «Insert» menu in Office going forward, you will see the Imageshop logo positioned on the far right of the toolbar, ready for use.
Tip for IT Administrators: Does your company use Microsoft Office 365? You can roll out this plugin centrally to all users across the entire organization simultaneously from the administration panel, so individual employees do not have to add it manually.
Get started and use the integration
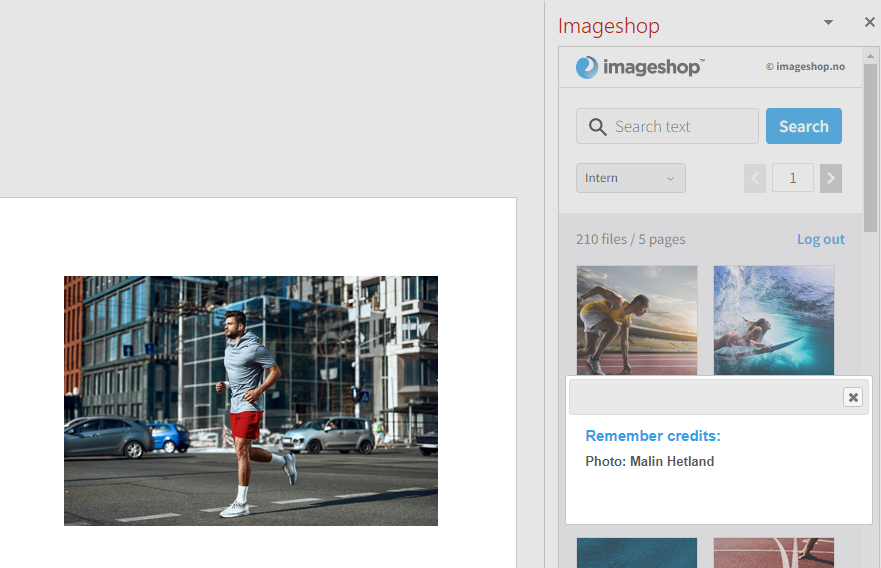
- Click on «Insert» in the top menu and press «Open Imageshop» on the far right of the toolbar to open the side panel.
- Log in with the same standard username and password that you use for your image bank. Make sure to check the box for «Remember me» so you do not have to log in again next time. (If your organization uses Single Sign-On / AD login, you can log in by clicking «Active Directory log in».)
- Once logged in, you will have direct access to all images that your user profile has permissions to view. If you have access to multiple different interfaces (for example, both an internal and an external image bank), you can easily switch between them using the drop-down menu in the panel.
- Use the free text search field to type in keywords to find the images you are looking for, and click the search icon.
- When you find the image you want to use, click directly on it to load it straight into your Word document or PowerPoint presentation. You can also view asset details such as descriptions and keywords by clicking the «i» icon in the bottom right corner of the image within the panel. From there, you can choose «Insert» to place the image, or «Cancel» to continue searching.

- If the image requires photo crediting upon use, a dedicated information notification (pop-up) will appear in the panel containing the photographer's name and applicable rights, as shown below.
Video Guide
Watch this short demonstration video for a full walkthrough of how the integration works in practice: