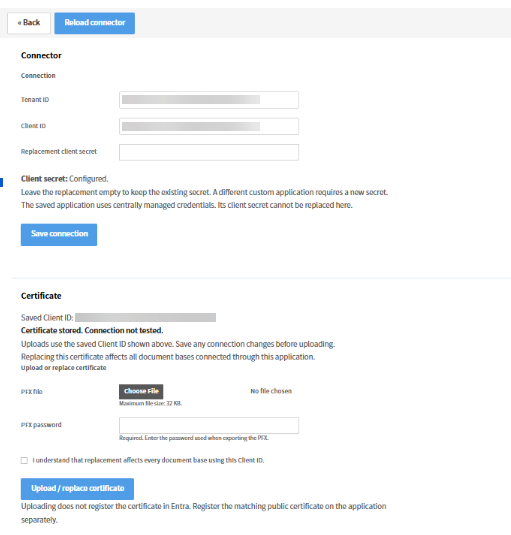
This guide explains how to connect Imageshop to SharePoint, choose where files are stored, map Imageshop information to SharePoint columns, and check that transfers work. A Microsoft 365 administrator may be needed for consent and access; Imageshop administrators handle the settings in Imageshop Admin.Use this guide when setting up the integration or when a SharePoint site, library, column, or transfer rule changes. Screen labels and available settings can vary between installations. Screenshots are examples; use the values for your own SharePoint environment.
Recommended workflow
- Have the SharePoint app approved and confirm access to the intended site.
- Enter the SharePoint site settings in Imageshop Admin.
- Synchronise the libraries and columns you plan to use.
- Map Imageshop information to SharePoint columns, if you need metadata transfer.
- Choose a direct destination or set up category-based routing.
- Test a transfer and verify both the file and its metadata in SharePoint.
Taxonomy is optional. If your organisation does not use SharePoint Managed Metadata columns, skip the taxonomy-specific section. The rest of the integration can work without taxonomy.
1. Prepare access and enter the SharePoint site settings
Get administrator approval
Before Imageshop can access SharePoint, the app must have the required Microsoft 365 consent and access to the intended site. A Global Administrator usually completes tenant consent. Site-specific access may also be required. The customer-side grant process is documented separately in the SharePoint Grant Guide.
- In Imageshop Admin, open Configuration and select SharePoint. Find the administrator-consent section.
- Enter your organisation’s Microsoft 365 tenant ID or tenant domain.
- Select Generate permission access link.
- Send the generated link to the responsible Microsoft 365 Global Administrator and ask them to review and approve the requested access.
- Wait for confirmation before continuing. The consent link is specific to your organisation; share it only with the responsible administrator.
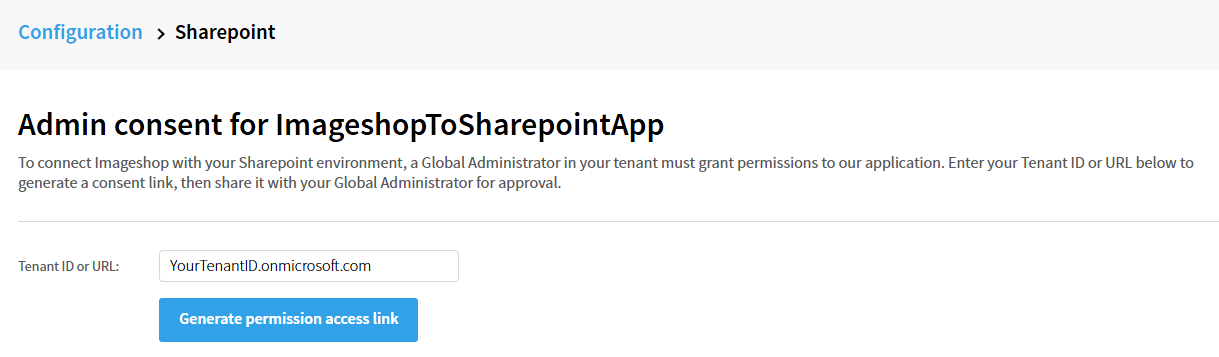
Enter your organisation’s tenant and generate the consent link.
Set the SharePoint destination
Open Imageshop Admin → Configurations → SharePoint → Edit basic settings. Select the customer-specific tenant and site covered by the approved access.
- SharePoint URL, tenant and site: Enter the URL and names for the intended SharePoint environment and site.
- Default library: Choose the normal destination when no category rule or direct destination applies. Create any needed libraries or folders in SharePoint first, then synchronise.
- Language: Select the language required for the Imageshop solution.
- Document version: Select the rendition or version to transfer, where applicable.
- File name template: Select the naming convention for transferred files.
Save the settings. Confirm the destination, rendition and filename with a test transfer.
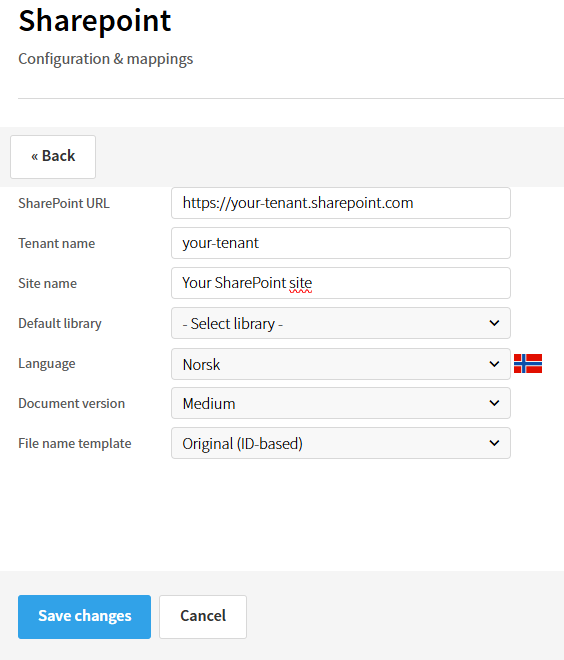
Example settings; values shown are placeholders.
Check the connection
Return to the SharePoint overview and check the connection state before synchronising.
- Microsoft Graph supports library discovery, ordinary column information, file transfer, and the taxonomy explorer.
- SharePoint API is additionally used by this integration to discover Managed Metadata (taxonomy) column definitions during library synchronisation. It does not replace Graph.
If SharePoint API access or its required grants are unavailable, Graph functionality may still work and library synchronisation may still complete. Taxonomy columns will be skipped; other discovered columns can still be configured. If you need taxonomy columns, ask an Imageshop super-administrator to check SharePoint API access, then synchronise again.
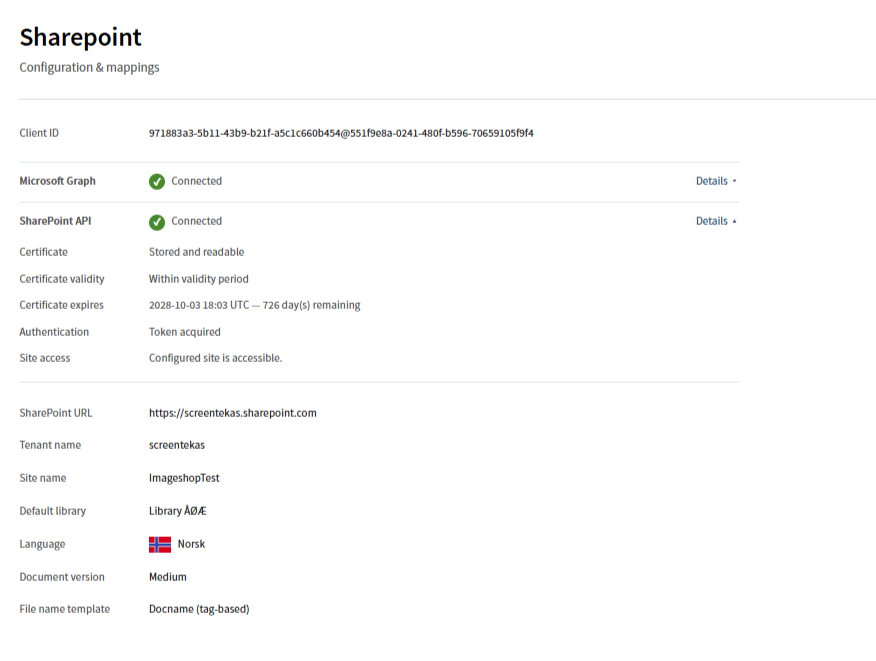
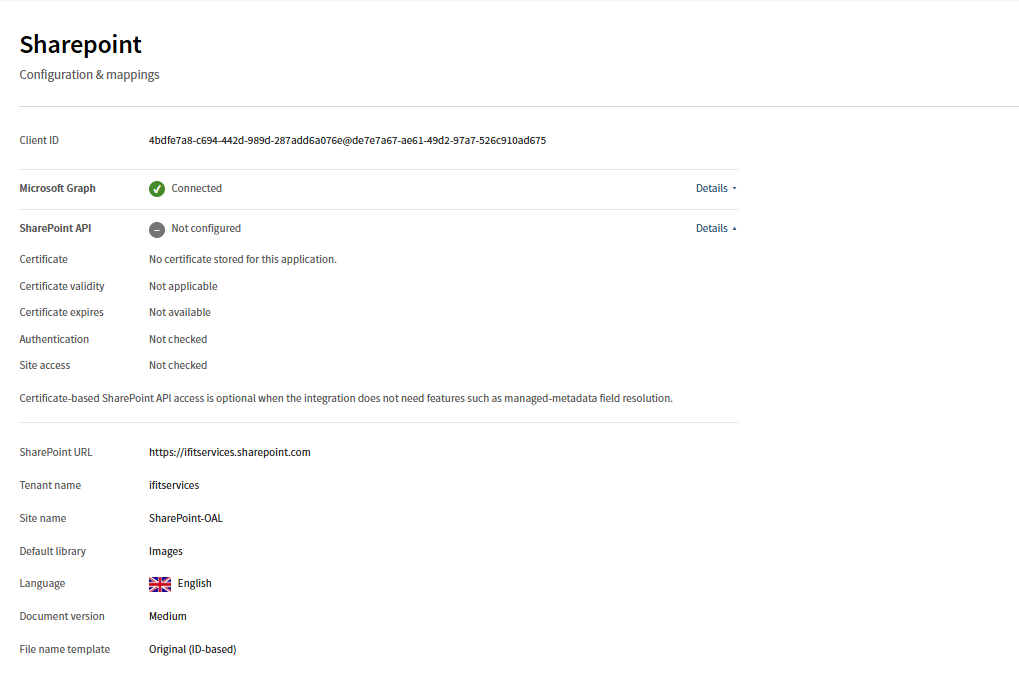
Examples of available and unavailable connection states. If a required connection is unavailable, ask your Microsoft 365 administrator or Imageshop support to check access.
2. Synchronise SharePoint libraries
Synchronisation
Synchronisation imports the available libraries and their column definitions into Imageshop. Run it after the connection is configured and whenever libraries, columns, or SharePoint Choice options change.
- In the SharePoint overview, select the intended site and choose Sync libraries.
- Wait for synchronisation to finish.
- Review the result. Confirm that the libraries and columns you plan to use are listed.
- If anything is missing, confirm the site and connection state, correct access or SharePoint settings, then synchronise again.
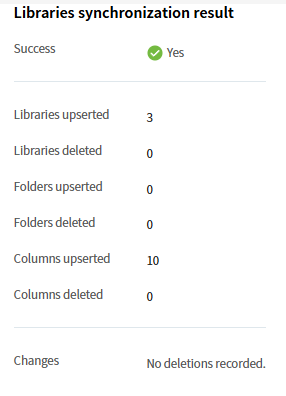
Review the result and confirm the expected libraries and columns were found.
If your libraries do not use Managed Metadata, missing taxonomy columns do not affect the ordinary library and column information you need. If you do use Managed Metadata and those columns are missing, check the SharePoint API connection and ask a super-administrator to help before synchronising again.
3. Map Imageshop information to SharePoint columns
Mapping metadata
A mapping tells Imageshop which value to place in a SharePoint column when an asset is transferred. Mappings are configured separately for each library because columns and requirements may differ.
- In the SharePoint overview, select Edit metadata for libraries.
- Choose the SharePoint library to configure.
- For each column you want to populate, select the Imageshop field or other supported source with the corresponding information.
- Check the destination column’s type and whether it is required. Make sure a compatible value will be available for each transferred asset.
- Save the mapping.
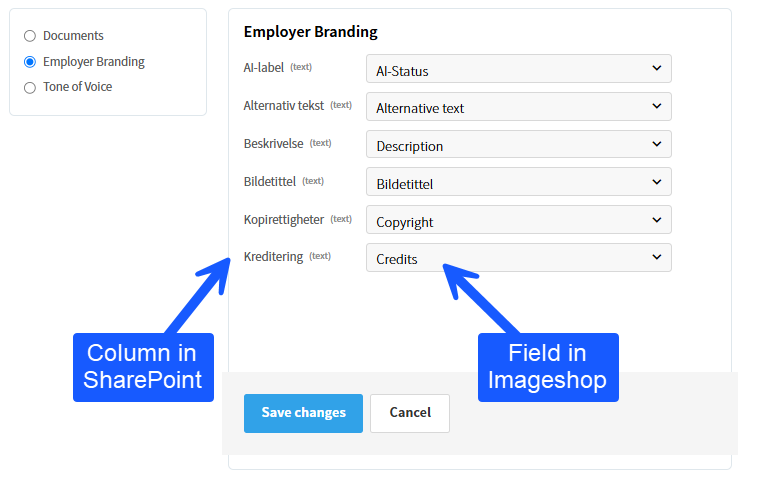
Example: mapping Imageshop sources to columns in one SharePoint library.
Choose values that match the column type
- Text or multiline text: Use a source that provides suitable text.
- Number or Yes/No: Use a source that provides a compatible number or yes/no value.
- Choice, single or multiple: Values must match the options allowed by the SharePoint column. Check whether one or multiple selections are supported. If Choice options change, synchronise again and review the mapping.
- Date or date and time: Use a valid date value in the expected format.
- Managed Metadata (term): These are taxonomy columns. Their discovery in library synchronisation requires the SharePoint API connection. Verify that the mapping and transfer work for the specific column.
- Lookup, Person/Group, Location and other specialised types: Do not assume these are supported. Use them only if Imageshop offers an explicit mapping option and a test succeeds.
Do not assume every SharePoint column type can be written by the integration. Required columns need a value for the asset being transferred. File upload and metadata update are separate operations: a file may appear in SharePoint even when one or more metadata updates fail. During a test, check the file and each mapped column.
4. Taxonomy — only if your SharePoint libraries use Managed Metadata
Skip this section if you do not use Managed Metadata (taxonomy) columns. Taxonomy is not required for ordinary library synchronisation, file transfer, or mappings to other supported column types.
Explore taxonomy terms
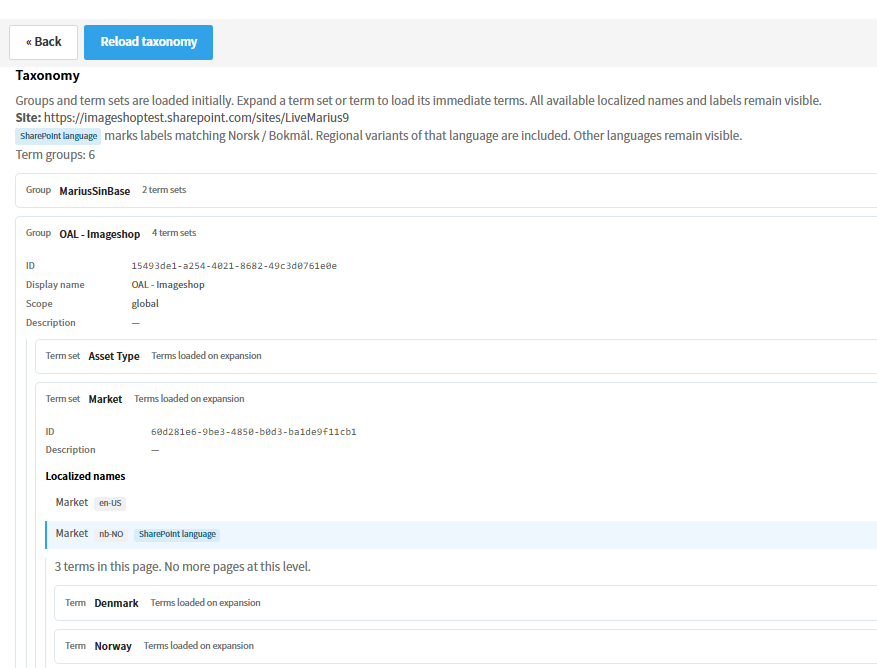
The Taxonomy view in Imageshop uses Microsoft Graph to explore term groups, term sets and terms. It helps administrators understand the available vocabulary.
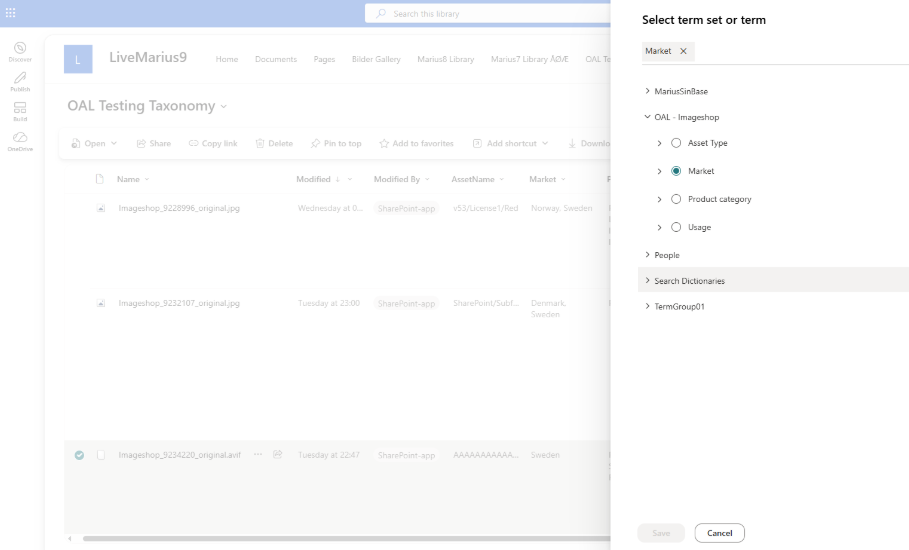
The Taxonomy explorer does not replace the SharePoint API connection required to discover Managed Metadata column definitions during library synchronisation. After confirming SharePoint API access, synchronise the library and check that its taxonomy columns are listed. Then configure and test the mapping.
Use the Taxonomy view within Imageshop to inspect SharePoint taxonomy information obtained through Microsoft Graph: term groups, term sets and their terms. This helps administrators understand the vocabulary used by Managed Metadata columns.
5. Choose where transferred files go
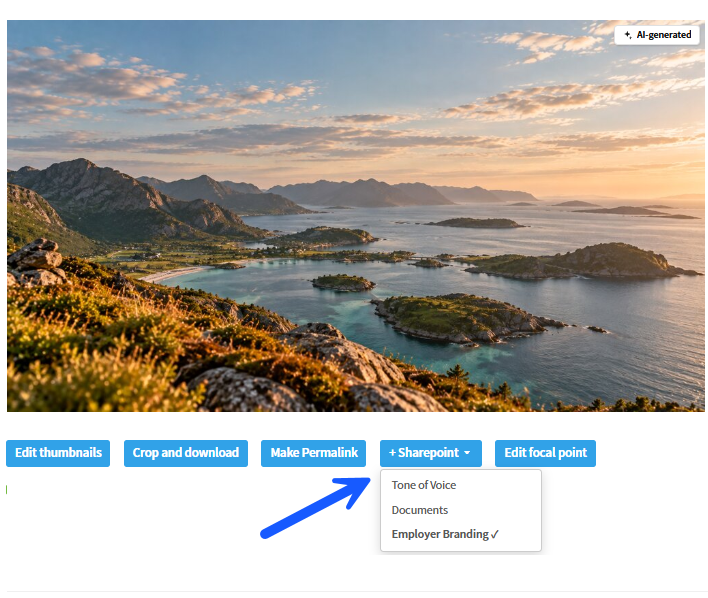
Option A: Choose a library for one asset
- Open the asset detail page in Imageshop Admin.
- Select + SharePoint.
- Choose the target SharePoint library and confirm it is the intended destination.
- Start the transfer. This explicit action is separate from category-based background routing.
Option B: Route assets by category
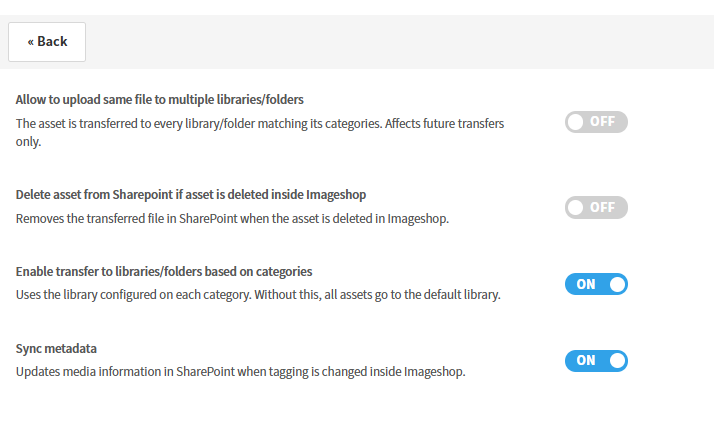
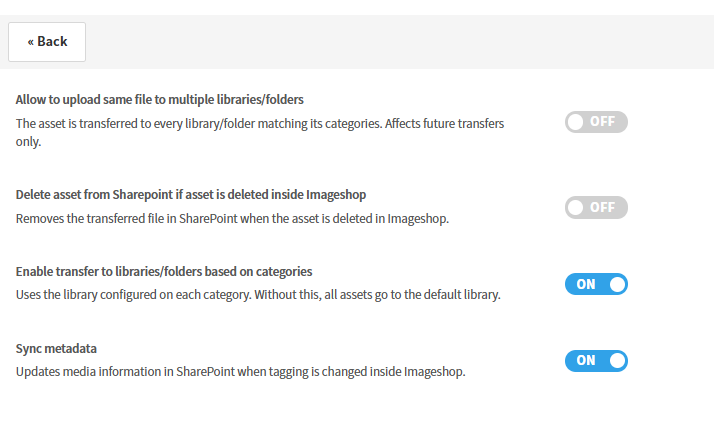
Use category-based rules when Imageshop should choose a destination from the asset’s categories while uploading a image. Review the general transfer settings and the default library together. Category routing only determines the destination when it is enabled. When it is off, the general/default destination applies, unless a destination is explicitly chosen for an individual asset.
- In the SharePoint overview, open Transfer rules.
- Turn on Enable transfer to libraries/folders based on categories.
- For each relevant Imageshop category, select the SharePoint library or folder that should receive matching assets.
- Review the other transfer settings, set rule priorities, and save.
Assign a destination to a category
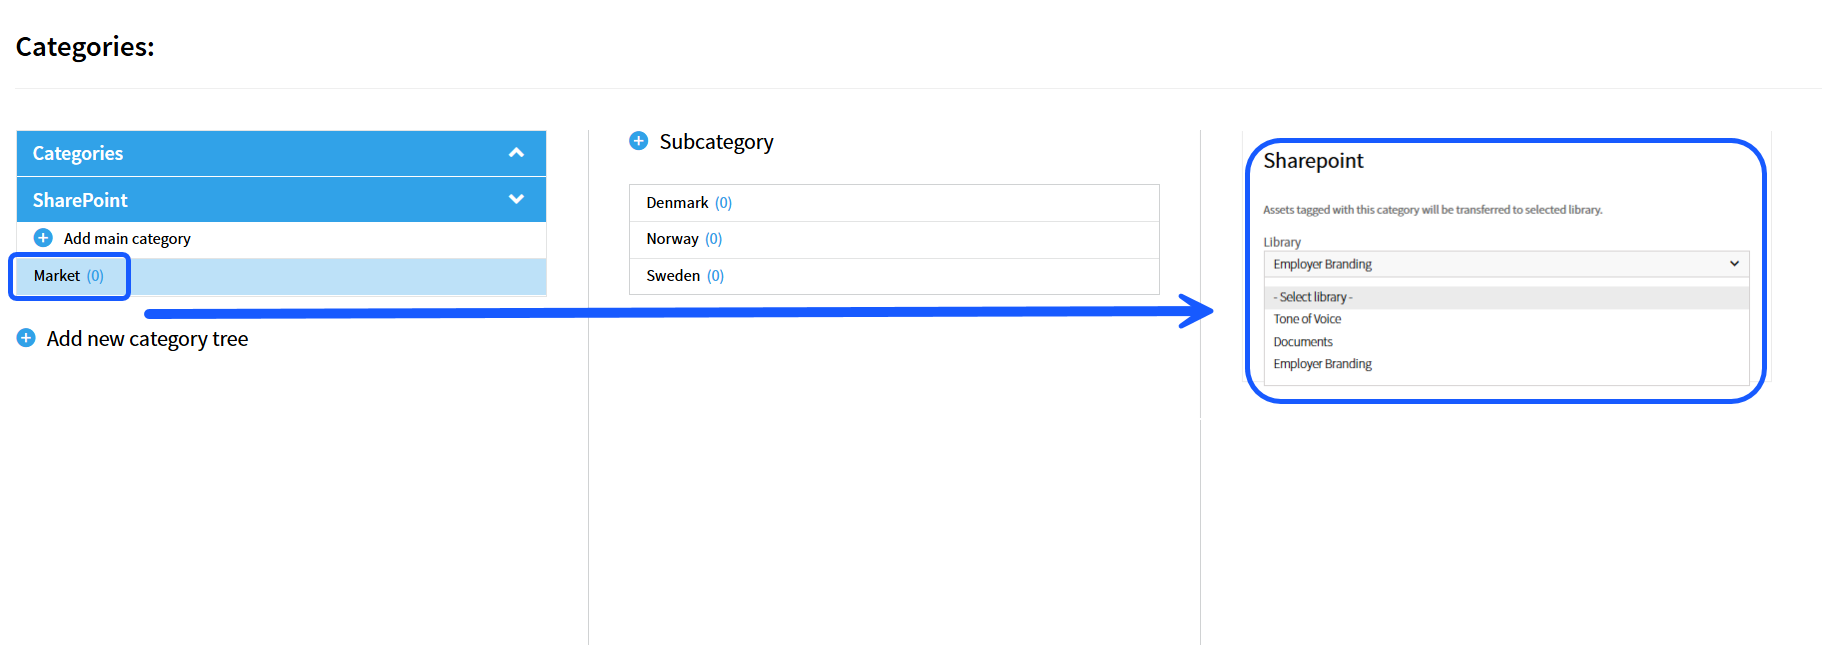
- In Imageshop Admin, open Edit → Categories.
- Select the main or subcategory that should determine the destination.
- Select the correct SharePoint library or folder and save.
Rule priority when categories overlap
If an asset matches multiple category rules and the setup sends it to one destination, the first matching rule in the ordered list wins. Put the most specific or highest-priority rule first. Reorder the rules in Transfer rules, save, and test with an asset that has more than one matching category.
If your installation offers Allow upload to multiple libraries/folders, check its setting: when enabled, an asset may be sent to every matching destination; when disabled, the first matching rule is used. Confirm the behavior with a test in your installation.
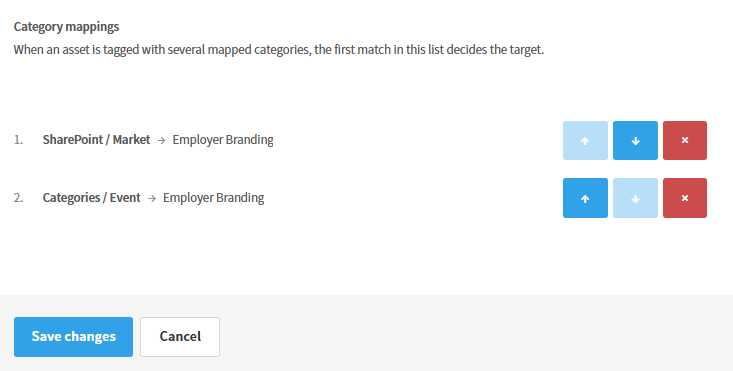
Other transfer settings (if available)
- Delete from SharePoint when deleted in Imageshop: If enabled, deleting an asset in Imageshop also removes its transferred file from SharePoint. Agree on this behavior with your SharePoint administrator before enabling it.
- Sync metadata: If enabled, changes to an asset’s tags in Imageshop update the corresponding SharePoint information. Test that the intended columns update.
6. Test and verify a transfer
Procedure
Test with one asset before transferring a larger group. If possible, choose an asset with the categories and metadata values you expect to use in normal work.
- Start a direct transfer or apply a category that has a transfer rule.
- Wait for Imageshop to show the transfer status. Treat this as an initial confirmation.
- Open the intended SharePoint library or folder and find the file.
- Check the filename and destination.
- If mappings are configured, check the SharePoint columns and compare their values with the asset in Imageshop.
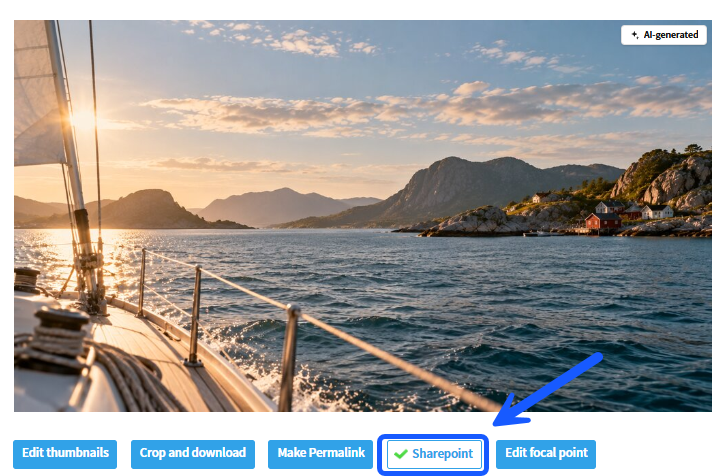
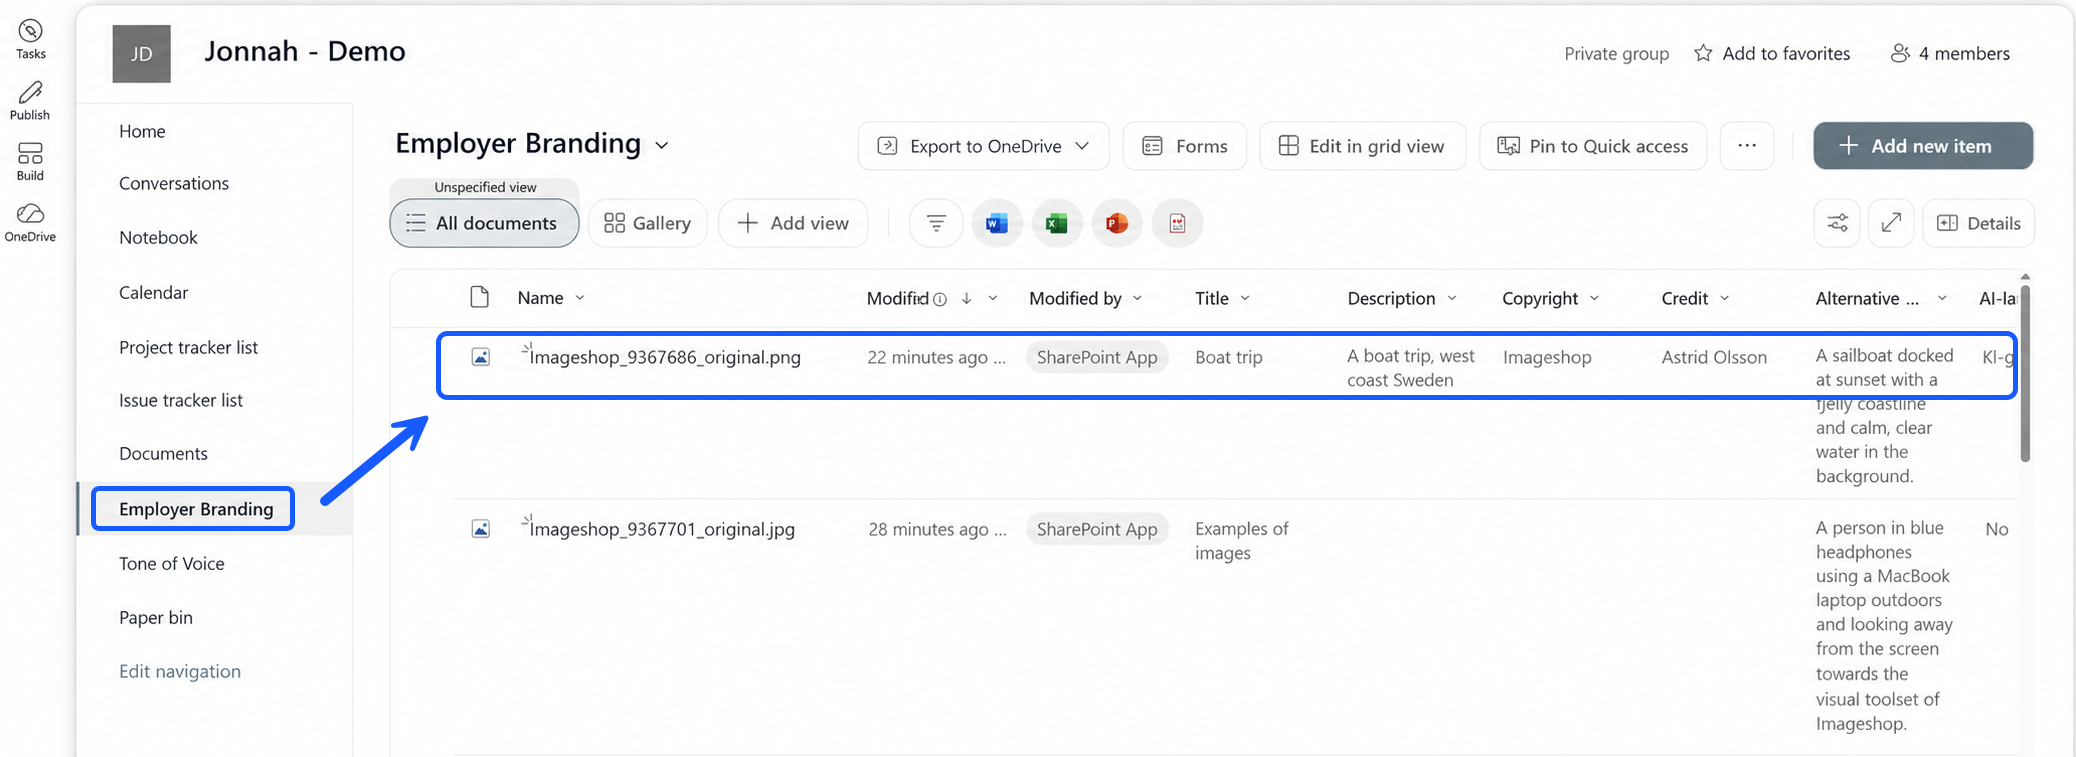
Example from the configuration guide: asset 7409170 was transferred to PdfLibrary as Imageshop_7409170_original.pdf. Your filenames and destination will depend on your settings.
7. Troubleshooting
The app has not been approved or the connection is unavailable
Confirm that the responsible Global Administrator completed consent. Check the SharePoint URL, tenant and site, and ask the Microsoft 365 administrator to verify consent and site-specific access. Check the Graph connection in the overview. Contact Imageshop support if the connection still fails.
Imageshop cannot find a library
Confirm that the intended site is selected, that the library exists, and that the app has access. Run library synchronisation again after any access or SharePoint changes.
A column is missing after synchronisation
Confirm that the column exists in the selected library, then synchronise again. If the missing column is Managed Metadata, check the SharePoint API connection and certificate configuration with an Imageshop super-administrator. Other columns may still have synchronised successfully.
The file went to an unexpected library or folder
Check whether category routing is enabled, which categories are assigned to the asset, the destination for each matching category, the order of the rules, and whether multiple-destination upload is enabled.
The file exists, but metadata is missing or incorrect
Review the mapping for the destination library, required values, column type compatibility, and allowed Choice values. File upload and metadata updates are separate; correct the mapping and test again.
The file is not in SharePoint
Check the transfer status in Imageshop and confirm the expected destination. For category routing, verify that the asset has the category used by the rule. If the issue continues, give your support contact the asset ID, destination and approximate transfer time.
Quick checks
- Cannot enumerate libraries: Check site selection, administrator consent, site-specific access and Graph connection.
- Taxonomy columns missing: Check SharePoint API access and certificate configuration, then synchronise again.
- Unexpected destination: Check category routing and rule priorities.
- Connector credentials: Ask an Imageshop super-administrator.
8. Setup checklist
- A Microsoft 365 Global Administrator approved the app, and the app has access to the intended site.
- The correct SharePoint URL, tenant, site and default library are configured.
- The overview shows the required connection state.
- Synchronisation found the libraries and columns you plan to use.
- Required metadata mappings are configured and tested.
- Category destinations and priorities are reviewed, if category routing is used.
- A test file appears in the expected SharePoint destination with the expected name.
- Mapped metadata values are verified in SharePoint.
- Credential renewal responsibilities are assigned to the right administrator.
For Microsoft 365 access changes, contact your Microsoft 365 administrator. For Imageshop configuration questions, contact your Imageshop support representative.
9. Connector credentials — Imageshop super-administrators only
Ordinary administrators do not normally need this section. The Connector page is reserved for Imageshop super-administrators. It is used to replace an existing Microsoft Graph client secret and configure SharePoint API authentication with a PFX certificate and its password. After credentials are replaced, return to the SharePoint overview and verify the connection.
- Imageshop-owned multitenant application: Imageshop renews credentials in its own Entra tenant.
- Customer-owned application: The customer renews the client secret and/or registered public certificate in its tenant, then securely supplies Imageshop with the new secret and/or corresponding PFX and password. An Imageshop super-administrator updates the connector after receiving the credentials.
- Certificate files: The public
.cercertificate can be registered in Entra. The corresponding.pfx, which contains the private key, and its password are needed for the Imageshop SharePoint API connector.
Send credentials only through an approved secure channel, not as ordinary document attachments. This guide covers entering or replacing existing credentials. App registration, certificate generation and customer-side Entra grants are outside its scope.