If you frequently upload images that require the same or similar information, you can save a lot of time by saving a pre-filled template. You can do this either directly from the administration panel or while in the process of uploading images.
Method 1: Create a template via the administration panel
- Log in to the administration panel via admin5.imageshop.no.
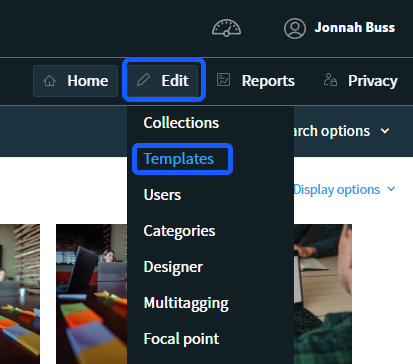
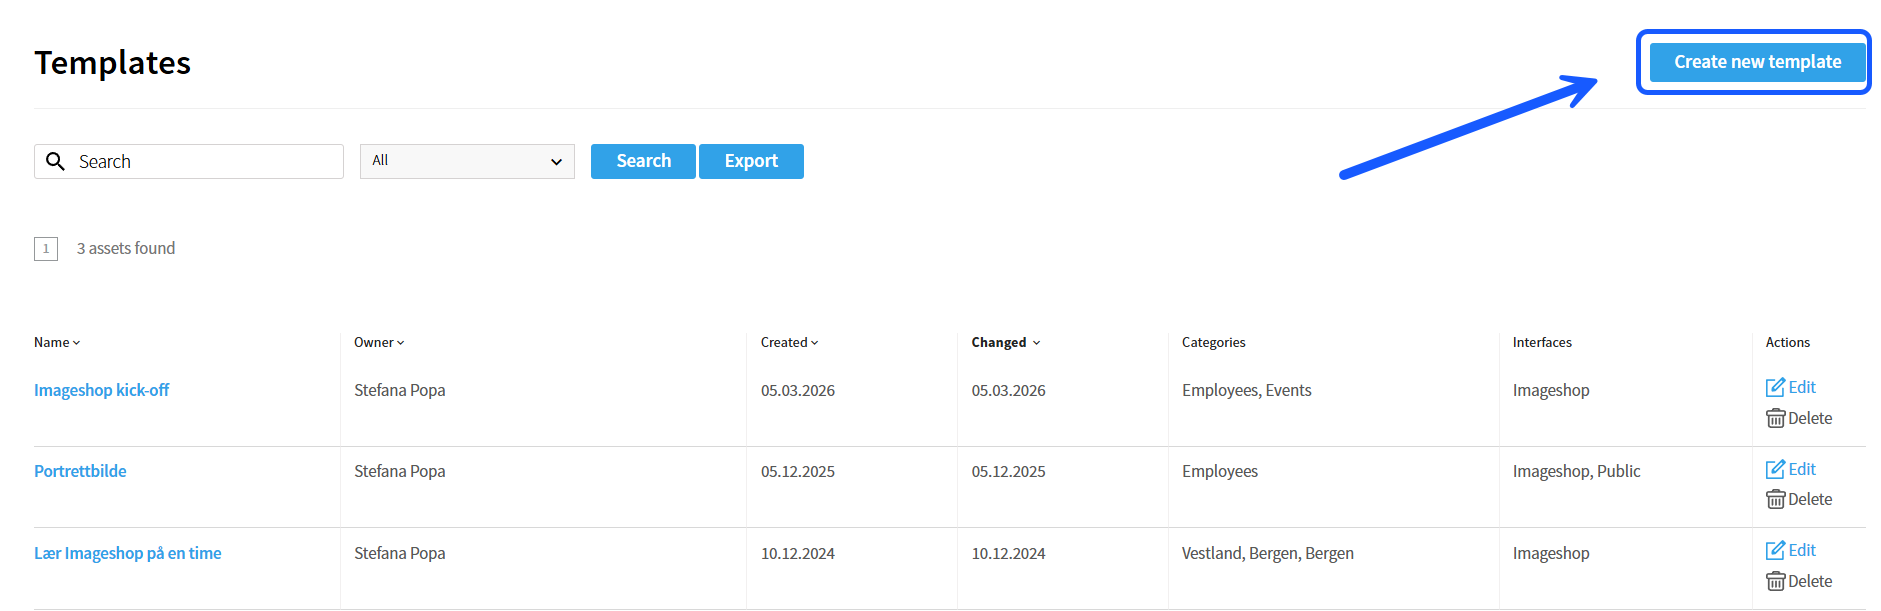
- Go to the main menu and select «Edit» → «Templates». Here you will also see an overview of existing templates that you can edit or delete.
- Click on the «Create new template» button.
- Fill in the information in the metadata form on the left that you want the template to contain each time it is used.
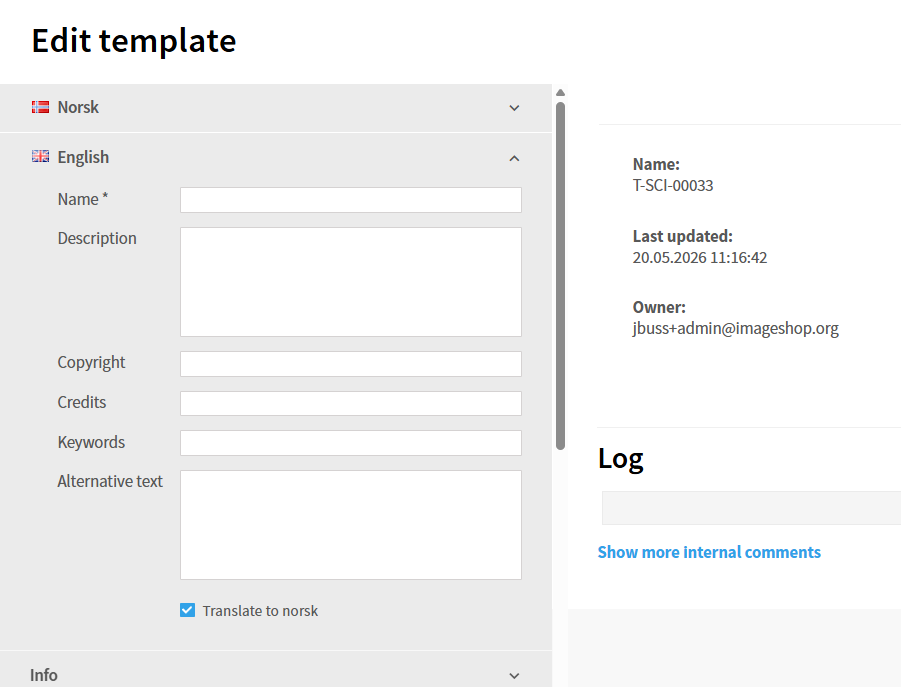
- Click on «Save template».
The next time you upload images, you will find your saved template in the drop-down menu at the top of the left-hand form. Selecting the template automatically tags the images with the stored information, instead of you having to fill everything out from scratch.
Method 2: Create a template during image upload
- Upload images as usual, and fill in the metadata in the form on the left side.
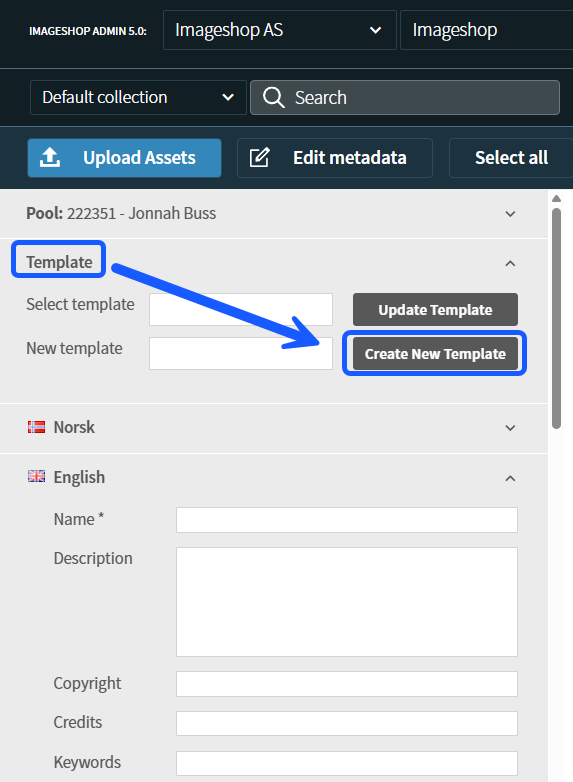
- Click on the «Template» button located at the very top (just above the field where you fill in the file's metadata).
- In the field under «New template», type a descriptive name for the template that makes it easy to recognize later.
- Click on «Create new template». The template will be saved and becomes immediately available for future uploads.