Multitagging allows you to efficiently import and update large numbers of images and their associated metadata in Imageshop using a CSV file. This is particularly useful if you have exported data from another system and want to automatically link your images to relevant information.
Examples of use:
You have thousands of images and a CSV file containing descriptions, product numbers, etc.
You want to update the tagging of existing images in Imageshop.
This guide begins with a quick overview of the multitagging process.
If you have never used multitagging before, we recommend reading the entire guide. After the quick overview, you will find a more detailed explanation of the CSV file requirements and step-by-step instructions for completing the import.
Quick overview – How Multitagging works
Upload your image files to Imageshop
– Images uploaded together are automatically grouped into a collection.Create a CSV file containing metadata/tags
– Include one row per file. Make sure you follow the requirements for format, separators, and file size.Go to “Multitagging” in the admin panel
– You will find it under the “Edit” menu.Upload the CSV file and click “Next”
Map the columns in the CSV file to the corresponding fields in Imageshop
– For example, “Product Name” to “Name”, “Description” to “Description”, etc.Select the collection containing the image files
– Either the collection containing the files you uploaded earlier or an existing collection.Start multitagging
– The system automatically updates the metadata in the background.Check the results and review any error messages
– Go to “Results” and “Show Details” to confirm that tagging has been completed.Search for the files in the image library to double-check that everything is correct
Before you begin
CSV file requirements:
Must be UTF-8 encoded.
The first row must contain column headers.
Fields must be separated by semicolons (;), tabs, or vertical bars (|). Commas cannot be used as field separators.
One line per document (no line breaks within fields).
Fields must not contain line breaks, hidden characters, or special characters.
Maximum file size: 2 MB. Files exceeding this limit must be split into smaller files and imported separately.
Identifier:
The identifier links each row in the CSV file to the correct image in Imageshop. You can choose between two types of identifiers:
- Filename (default)
- A specific information field (requires configuration by Imageshop Support)
How to use commas for multiple values in a single field:
Commas can be used normally in text, such as descriptions. They can also be used to separate multiple values within a single field, such as the category field. For example, a file may have “People, Employees” as the value in the “Category” field.
Column headers:
You can choose your own column headers in the CSV file. When uploading the file to Imageshop, you will be able to map each column to the corresponding field in the system. This gives you the flexibility to use CSV files generated by other systems, as long as the content is correctly structured.
Example:
In this spreadsheet, we have used images of planets as examples. There are four columns: Filename, Planet Name, Description, and Keywords.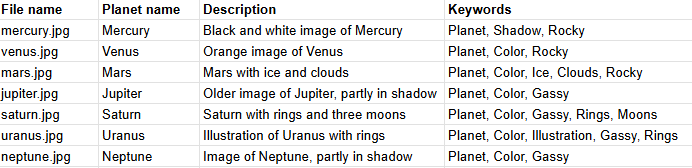
Example of column mapping:
Once the images have been uploaded to the image library and the CSV file is imported, the column names are mapped to the metadata fields in Imageshop. We will:
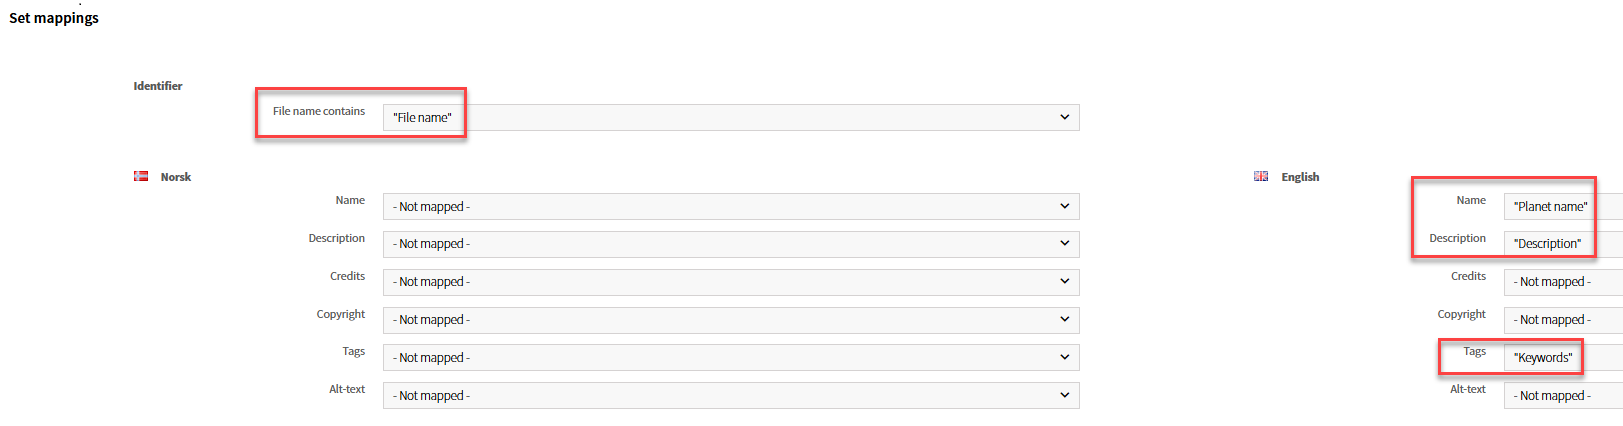
map Filename to the system field Filename
map Planet Name to Name
map Description to Description
map Keywords to Tags
When using multitagging, you will probably have more columns, possibly including filenames, descriptions, and other information in multiple languages. However, the principle remains the same: each column corresponds to a metadata field in Imageshop.
Once the spreadsheet has been converted into a semicolon-separated CSV file, it will look like this:

Each column is separated by a semicolon. Columns can also be separated by tabs or vertical bars (|), but not commas. Keywords, however, are comma-separated (other values, such as categories, can also be comma-separated), as highlighted here:

Importing with Multitagging
How the multitagging import process works:
Upload your image files.
Create a CSV file containing the tagging information.
Map the columns to the correct fields.
The system automatically matches the tagging information to the images based on filenames or another identifier.
Tip: We recommend starting with a small test import (e.g., five rows) before importing hundreds or thousands of files.
Step-by-step instructions:
Upload your image files if they are not already in Imageshop. When you upload all the images at once, they are automatically added to a collection. This will be useful later in the process. Note that the collection name will differ from the example shown in the screenshot below.
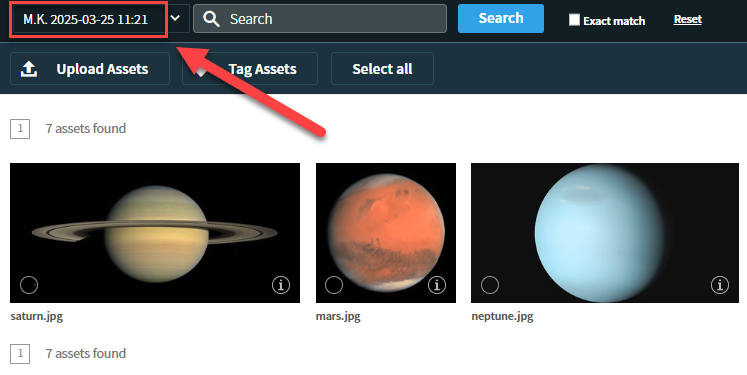
Create a CSV file containing the tagging information for your images. Make sure it meets the requirements described above.
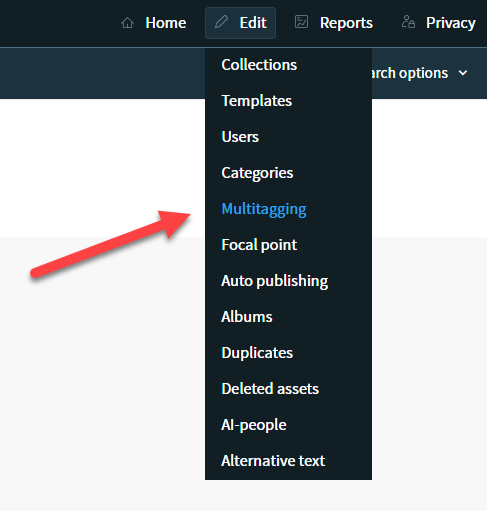
In the admin panel, click “Edit” and select “Multitagging” from the dropdown menu.
Click “Browse” and select your CSV file.
Click “Next”.
Map the columns in the CSV file to the corresponding fields in Imageshop.
Click “Next”.
From the dropdown menu, select the correct collection.
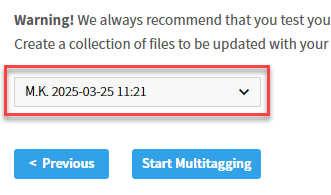
Click “Start Multitagging”.
When the multitagging process is complete, the system will display “100%”, the number of images tagged (e.g. “7/7”), and the status “Completed”.
If not all images have been completed, for example, if the system displays “5/7” or “0/7”, this means something went wrong when tagging some or all of the images. If this happens, check that the filenames in the CSV file are correct and that all the relevant files are included in the CSV file (see the next step).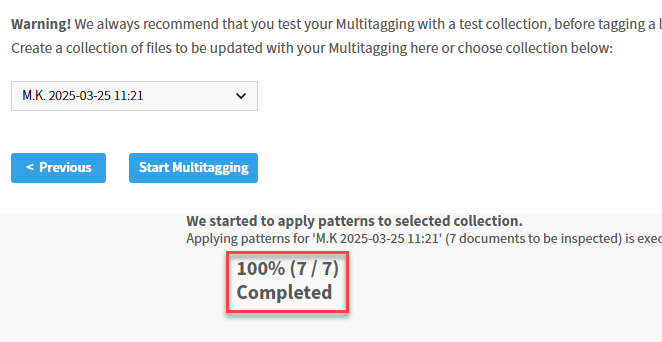
When the status shows “100% Completed”, click “Results”. At the top of this page, you will find a report. Click “Show Details”.
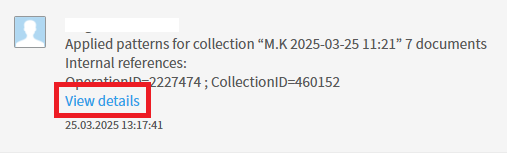
You will then see a list of all the files, showing which files were successfully matched with the CSV file and which were not. Files that could not be matched with the CSV file will have a link, as shown in the example below. Clicking the link allows you to see which file is affected and what metadata Imageshop has registered for that file.
Once all files have been successfully matched with the CSV file, use the search function in the image library to find a few of the images and verify that the metadata has been added as expected – for example, in categories, keywords, or other fields.
